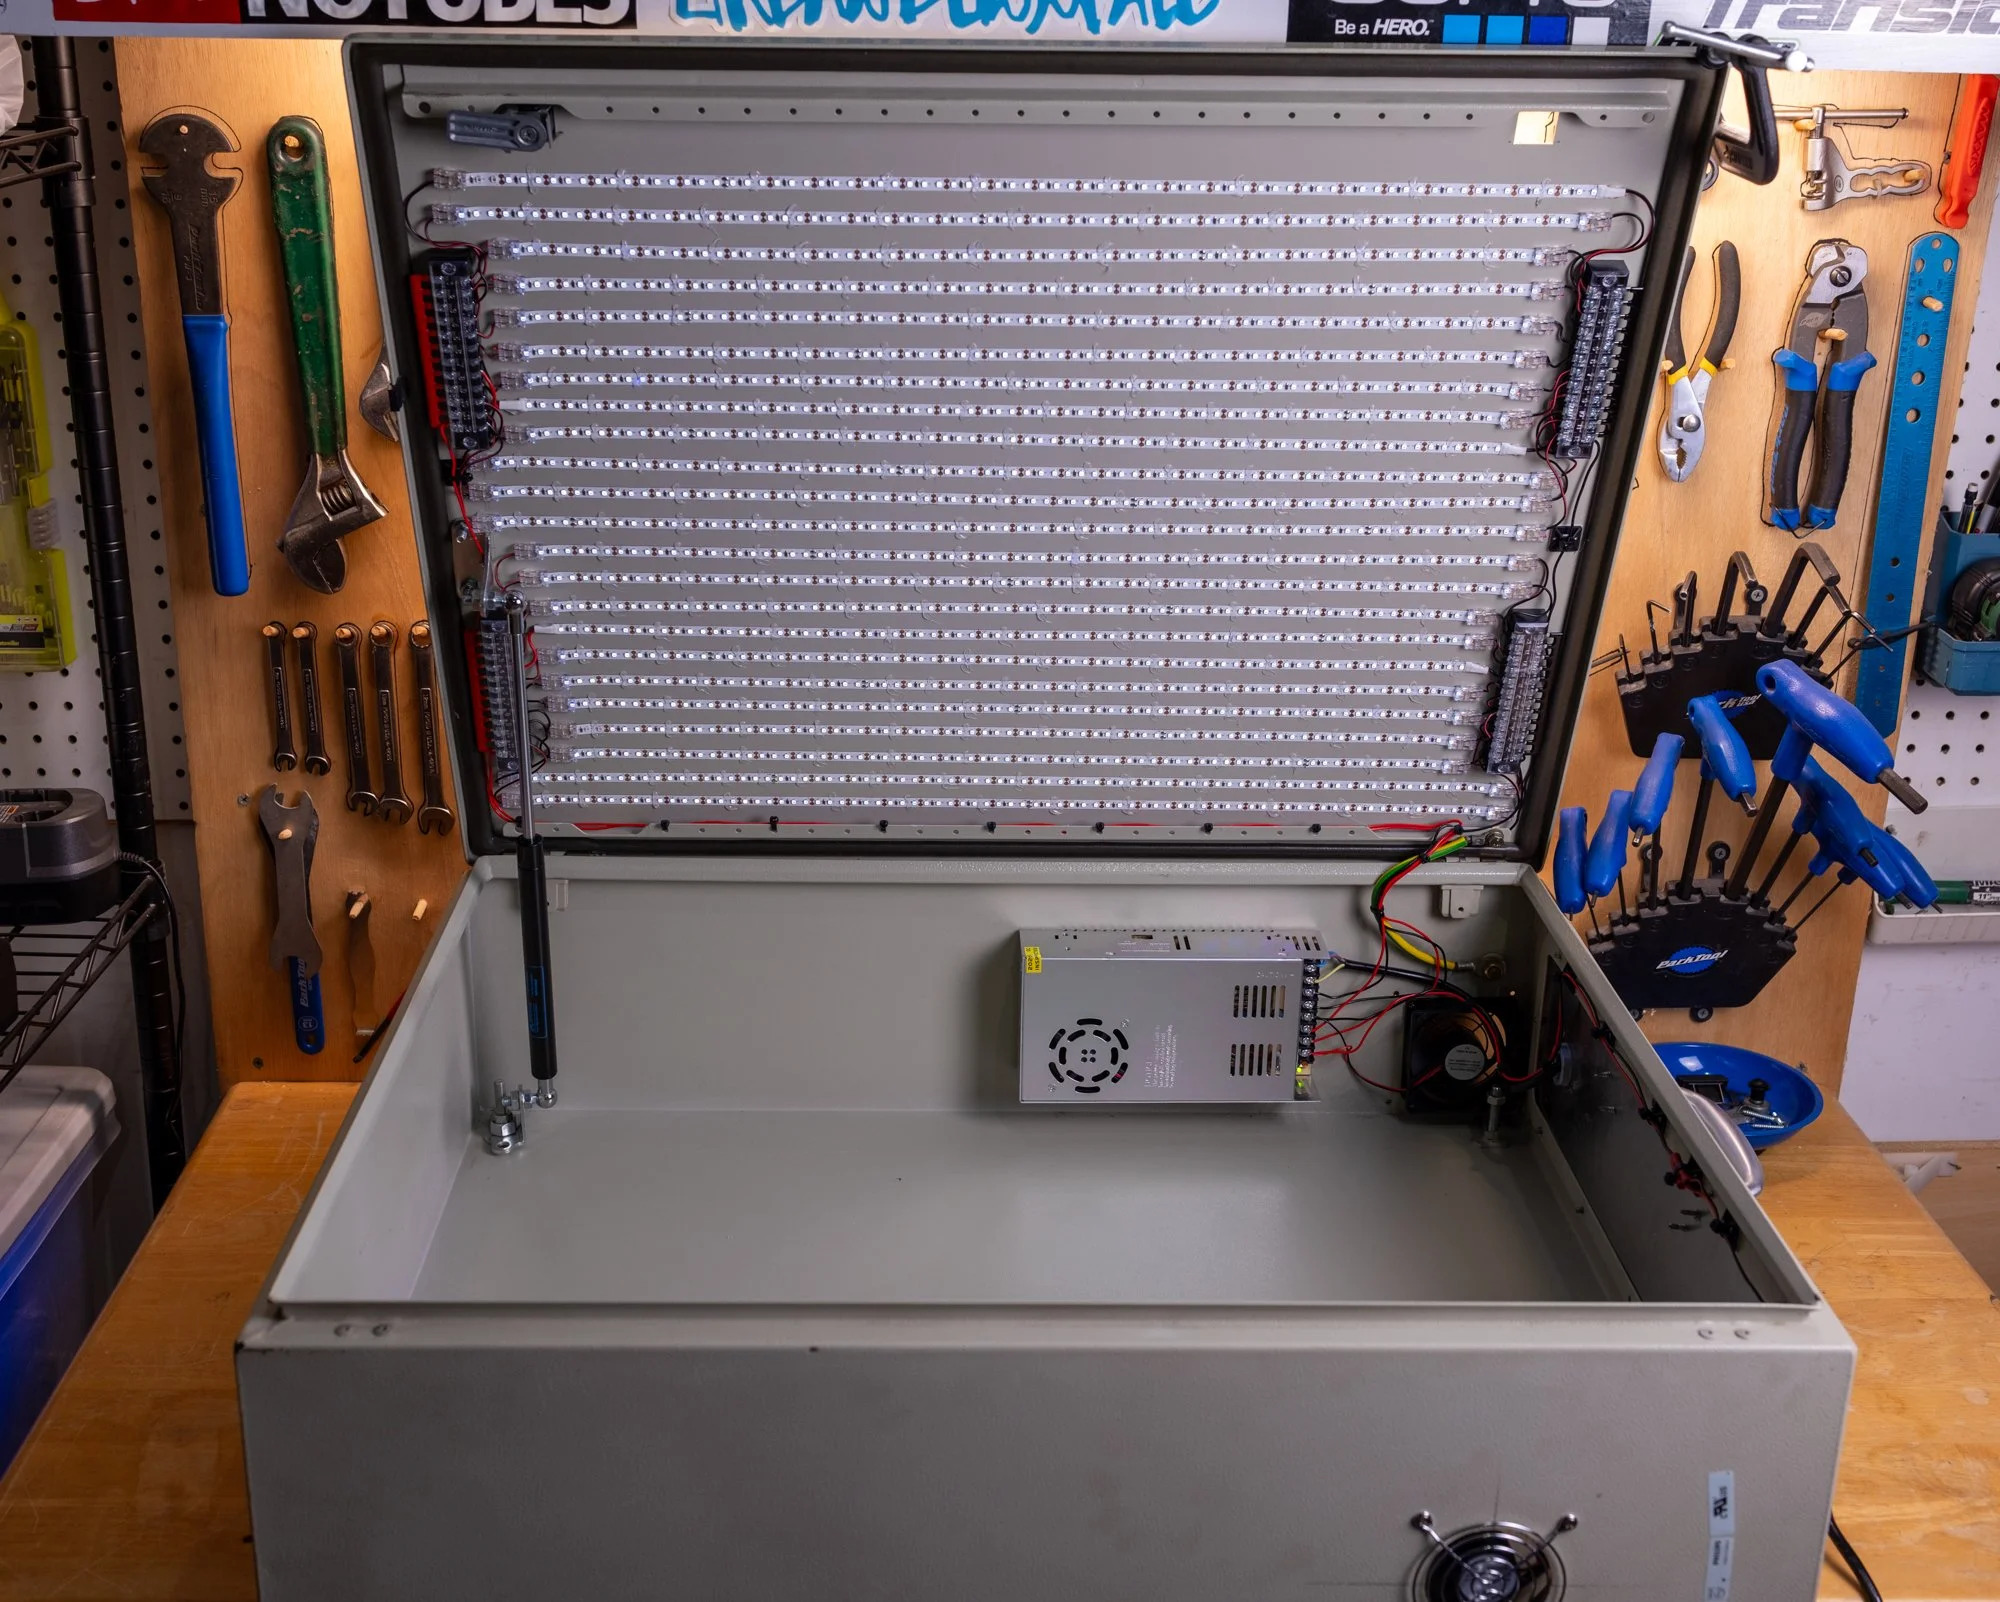
UV Exposure Box for Alternative Process Photo Printing
I’ve been wanting to build a UV exposure box for alternative process photo printing, such as cyanotype and platinum palladium printing, for quite some time. I’ve been slowly collecting the parts and pieces that I needed for this build for a couple of years, and finally got everything needed to build it. The exposure box itself is built around an electrical utility box that I got on eBay for a great deal. This type of enclosure is highly recommended because they’re very sturdy, come in all shapes and sizes, and can affordable options can be found second-hand. Additionally, you don’t have to buy supplies, like wood, to build the box itself, saving time and money. I’m quite sure I spent less on the box than I would have if I had tried to build it out of wood, and saved myself the stress of having to build it!
UV Exposure Box for Cyanotype and Platinum Palladium Printing using 365nm LEDs
I started the build with the mechanical portion, such as installing a gas strut to hold the lid open, installing the power supply and fans, and then moved on to the electrical components. One important thing to keep in mind when building a UV exposure box using LED light strips is that the LEDs need to be wired in parallel. This maintains consistent light output, and allows you to cut the strips to make them fit into a box. Wiring them in parallel requires LED strip connectors that are then wired into terminal blocks that distribute power to multiple strips.
Another important thing you will need to calculate based on the size of your box is how large of a power supply you will need. I did this by looking at the number of watts each LED required, multiplied by the total LEDs that the box would have. In my case, it was about 380 watts, so I went with a 400 w power supply to give a little buffer. This power supply has a 12v DC output, which also allowed me to power the computer fans which have the same voltage requirement.
Wiring everything in and sticking them to the lid of the enclosure took the longest. It was a very tedious process, and took several hours, but it looked great.
If you’re interested in building a similar UV exposure box, you can reference my build list below. Just keep in mind that you might need to customize the quantities based on your build, but this will hopefully give you a good start!
| Item | Quantity | Total Price |
|---|---|---|
| LED Strip Connectors - 10 pack | 5 | $44.95 |
| Gas Struts - 2 pack | 1 | $25.99 |
| 365 nm UV LED Light Strip, 16.4 ft | 3 | $119.94 |
| Terminal blocks - set of 5 | 1 | $12.99 |
| Plug | 1 | $3.99 |
| Cooling fans - 2 pack | 1 | $12.99 |
| 18 AWG wire | 1 | $7.88 |
| 22 AWG wire | 1 | $7.88 |
| 12V 400W Power Supply | 1 | $25.99 |
| Cable tie adhesive mounts | 1 | $5.39 |
| Door pull handle | 1 | $9.18 |
| Gralab darkroom timer | 1 | $80.00 |
| Electrical utility box | 1 | $60.00 |
| TOTAL | $417.17 | |
If you’re interested in watching a video of the build process, you can check out my video on YouTube below:

